How does the interface work?
AffiliationSoftware’s interface is very easy to use. You just need to understand the basic concepts explained on this page.
For this example we used the page “Users” from the admin panel, but all the other pages of your affiliate network work the same way (campaigns, banners, transactions, etc).
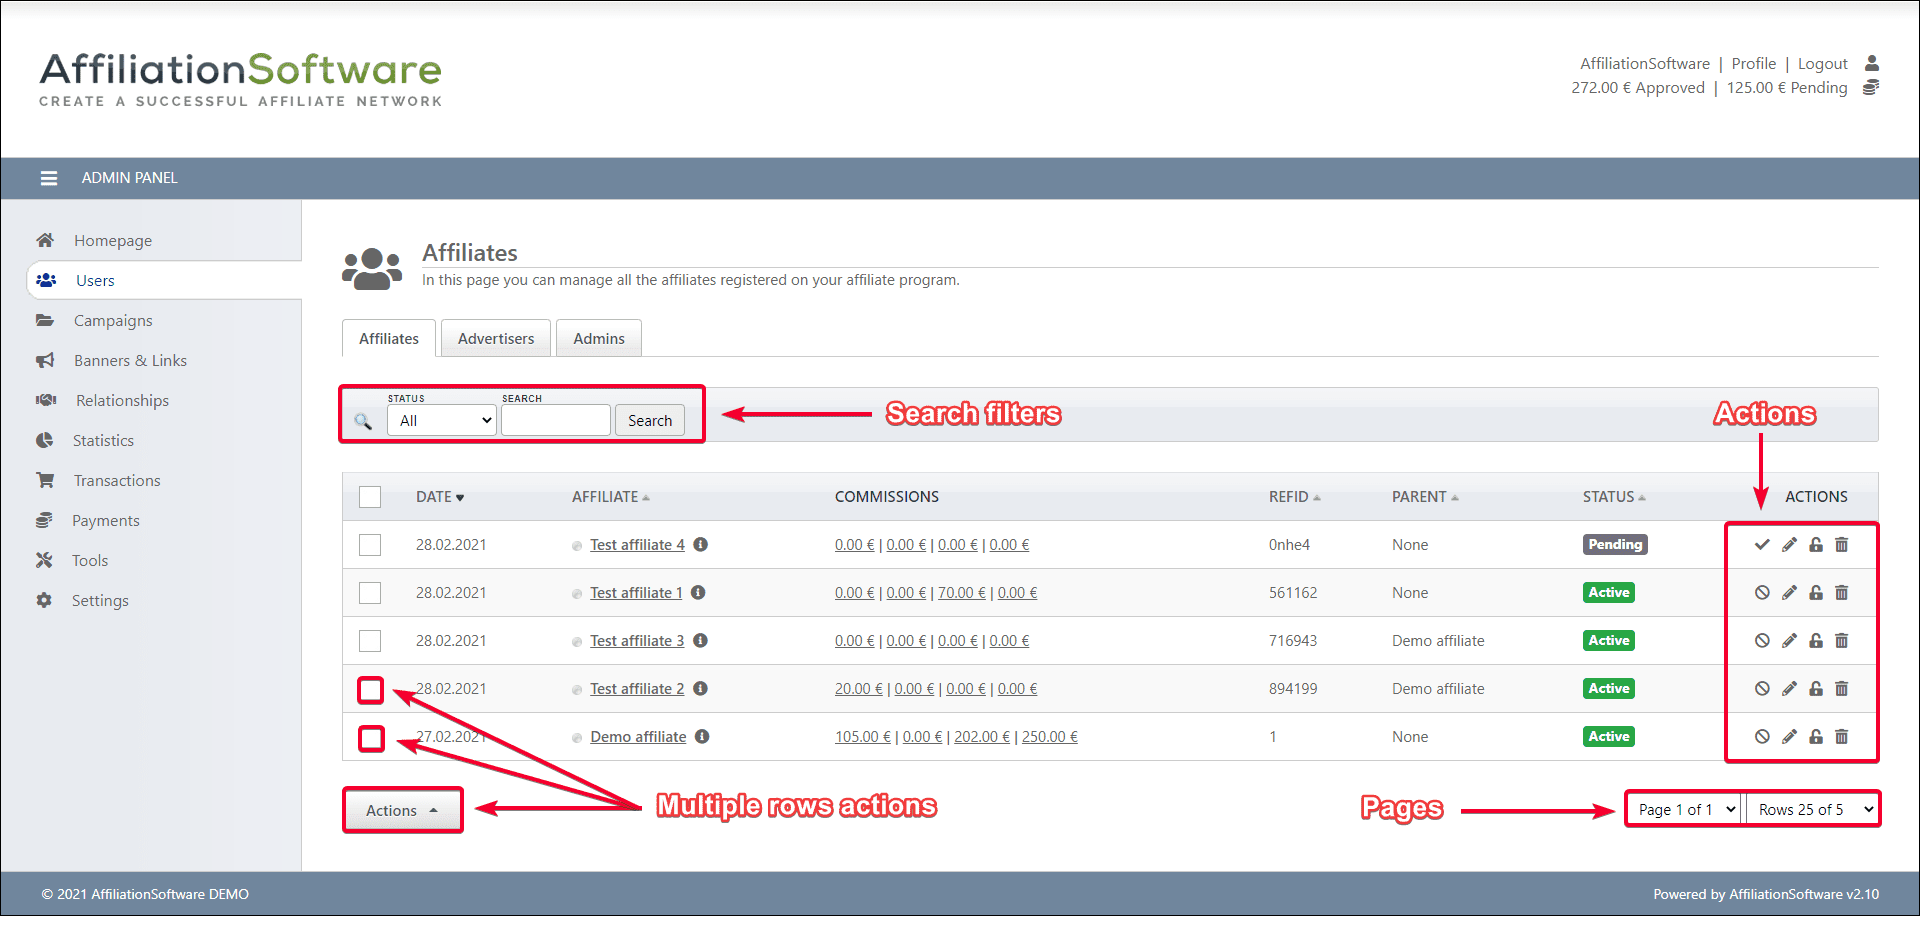
2.1 How to read and manage data
Each row corresponds to an affiliate. With the icons located on the right of each row you can perform specific actions on that affiliate. If you click on the pencil icon you can edit the affiliate's profile. If you click on the trash can icon you can delete the affiliate.
You can also perform an action on multiple affiliates simultaneously. Just select the rows by checking the box on the left, and then use the "Actions" button available at the bottom of the page.
To search among the results you can use the search filters, which are located at the top of the page.
You can change the page and number of rows displayed per page using the buttons located at the bottom of the page on the right. To sort the rows in alphabetical order click on the column "name".
2.2. How to Add and edit data
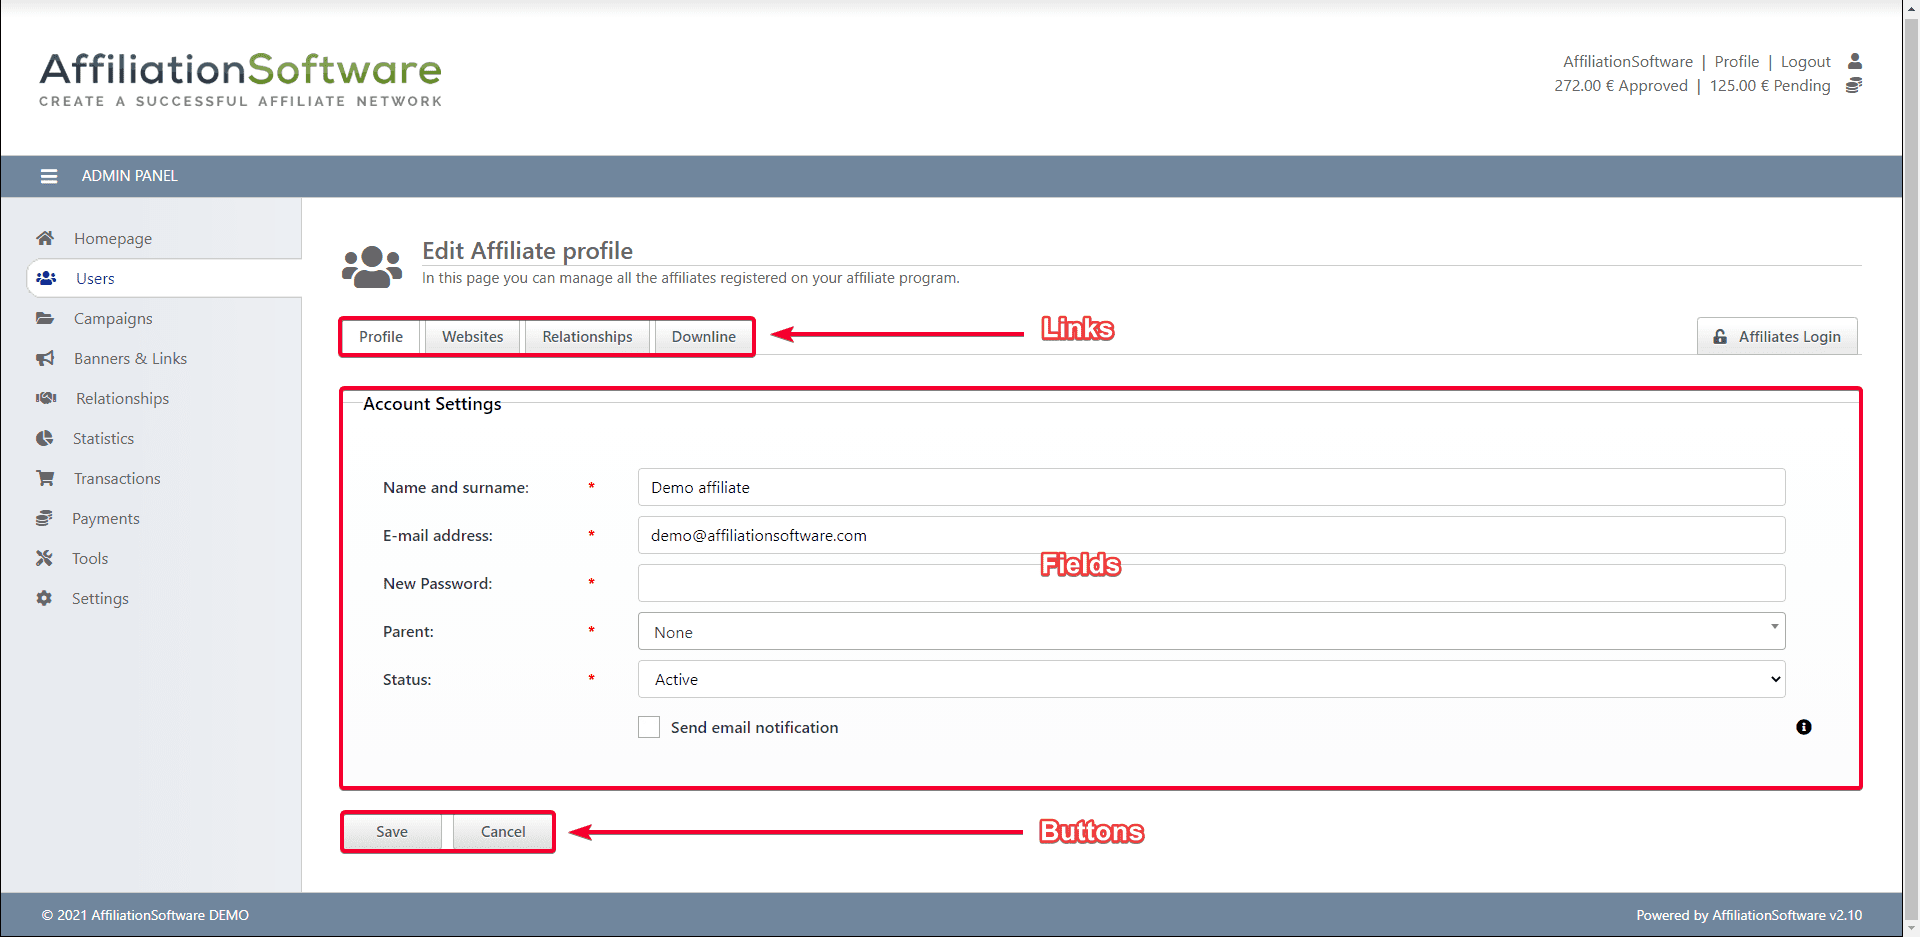
To add an affiliate click on the "Actions > Add" button located at the bottom of the page.
To view and edit the data of an existing affiliate click on the pencil icon, located to the right of each row.
Complete the required fields. Required fields are marked with a red asterisk. Optional fields can be left empty. Click on the icon on the right to see an explanation of the field.
To save the changes click on the "Save" button located at the bottom of the page. To cancel the changes and return to the previous page, click on the "Cancel" button.
The links at the top of the page lead to related pages, in this case to the affiliate's websites, statistics and downline.

 English
 Italiano
 Français
 Deutsch
 Español